Based on Studio2022 v4.2.1.
Settings Explained#
Now lets have a short look at Studio202x's settings. Or better said Preferences, because there are all the detailed option located by which Studio2021's performance can be tweaked and the appearance can be influenced.
Settings#
You reach the dialog via the top menu bar.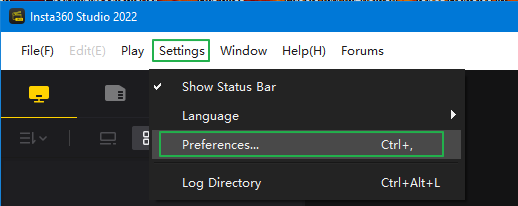
First in the Settings you find the option to enable/disable a status bar which will show you a short information about what Studio202x does. For example saving a Project file.
Next you can change the Language Studio2021 uses in its GUI.
The Log Directory is of interest in case you have a problem and mailed Insta360 support about it. They might ask you for some logfile of Studio2021 which can be found by following that option.
Yes, we jumped over "Preferences" but because it hols a bunch of additional options it looks reasonable to cover that in the next chapters.
Preferences#
The "Preferences" are organised in three main sections which then also split in sub-sections.
Codecs#
A (video) codec refers to a pair of algorithms for encoding and decoding digital videos. This gives your videos an interchange able format and size. As those do calculations those can be done purely on the CPU or on a hardware which supports the related codecs. Most Graphics Processing Units (GPU) have the encoder/decoder stored in their hardware and using such a supporting GPU speeds up the processing of a video immensely.
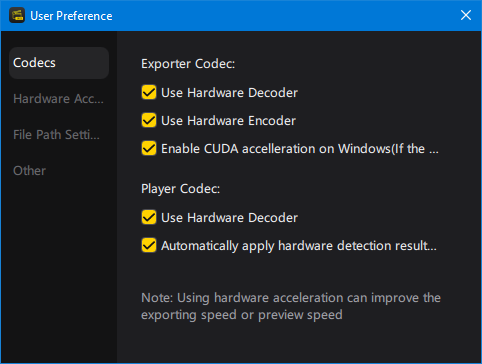
- Exporter Codec
- Use Hardware Decoder
- Use Hardware Encoder
- Enable CUDA acceleration on Windows (if the graphics card supports)
- Player Codec
- Use Hardware Decoder
- Automatically apply hardware detection results to set codec options
During export, Exporter Codecs are used. Don't be confused by the "Hardware Decoder" option, even though exporting means encoding. But the h.264/h.265 stored in the insv must be decoded before your edits can be encoded into a new file, which is then saved as mp4 (h.264/h.265) or ProRes, depending on your choice in the export dialogue.
The "Hardware Encoder" covers exactly that last step. To use the hardware based GPU support for encoding videos to h.264/h.265.
NVIDIA graphics cards offer an additional option of calculation support. CUDA, which initially stands for Compute Unified Device Architecture, is a parallel computing platform and programming model developed by NVIDIA. By it program code can be "outsourced" to the GPU to speed up calculations.
All three sub-options cover the same purpose, to speed up the encoding/decoding of a video. At first glace it seems as too much good, but not all GPUs support hardware based encoding/decoding for all codecs or mainly h.264/h.265. Some support hardware based decoding of h.265 but not the encoding, which then has to be done on a pure software layer which normally would run totally on the CPU. But if the GPU also supports CUDA there is a chance that parts of those calculations are directed from the CPU to the GPU.
Side note for Nvidia:
Hardware encoder support for h.264 is limited to 4K anyway while using NVENC, NVidias hardware based encoder used along with CUDA. Only for h.265 and with supported GPUs you get hardware based encoding up to 8K.
"Hardware encoder" and "Enable CUDA acceleration [..]" seems doubled but the last mainly targets the hardware support for h.265 encoding. It might happen, that Studio202x disables your selection for CUDA. Then your GPU does not support h.265 encoding in hardware.
And AMD GPUs do not support CUDA and because of that the CUDA option is of no use with AMD GPUs. They support OpenGL. Which also is a software layer to speed up calculations but needs different methods to be utilized.
The "Player Codec" part is simple. Just for playback, for example in the preview area, a video only has to be decoded. And all current GPUs should support hardware based decoding of h.264/h.265.
With "Automatically apply hardware detection results to set codec options" Studio202x overrides selection to use hardware decoder by data gathered during the start up check for hardware based codec support. This does Studio2022 on every start.
Hardware Acceleration#
This section deals with settings to enhance the image quality and appearance, while Codecs define the "framing".
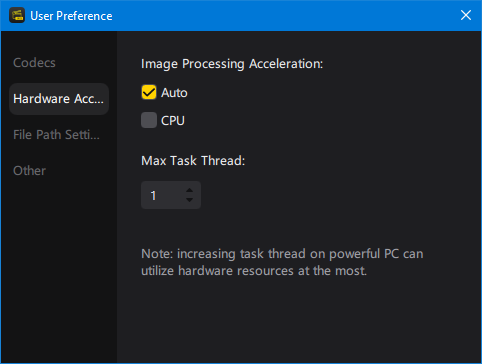
Image Processing Acceleration
Just as the hardware-based encoder/decoder is responsible for the file format, this option targets the quality of the content in detail. You can leave the choice to Studio2021 if it uses GPU or CPU or lock it on the CPU. Like said, this option is only considered if you've selected to enhance the image / video either with ColorPlus and/or to remove Grain.
Antialiasing (before v4.0.0)
This is used to make lines look good, especially if they are not totally horizontal or vertical. In that case, because lines in a digital image are based on pixels, they build steps at their edges. Antialiasing is used to smooth those steps and make them look like natural lines again. Multisampling Anti-Aliasing (MSAA) is the most common technique to do that. Normally it can be used in different grades given as 2x MSAA , 4x MSAA or up to 8x MSAA. But the higher grades have significant impact on the systems overall performance. 8x MSAA can allocate up to 20% of a GPUs performance.
Maybe that GPU impact is the reason current version does not show it as a user selectable setting anymore. Studio202x tries to get the best out of your content based on the abilities your system shows during the detection tests.
Max Task Thread
Under this section you can influence if Studio2021 uses more parallel threads for starting exports with "Max Task Thread". The number reflects the parallel started exports. Raising it depends on the computing power of your system and its I/O capacity. Remember, videos do not only need to be decoded/encoded but they also need to be saved to disc again.
Side note:
It's a good idea to separate the source from the target, meaning have your source video files on one physical drive and the export target on another physical drive. On slower system (CPU/GPU) systems the improvement is relative, nearly not noticeable, but on more powerful systems where you raise the level of parallelism which also hits file handling, you better utilize the I/O channels. Even on PCIe NVMe SSD drives. If you use a cluster storage, MediaHub like or RAID storage system that does not bother you. Nevertheless that kind of structure ease organizing tasks. ;)
File Path Settings#
 In this section Studio202x settings provides settings to different file paths Studio202x uses.
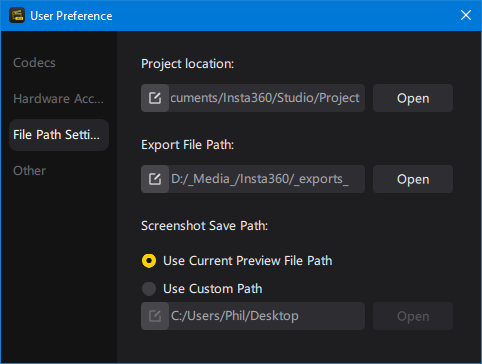
Project Location
You may already know this setting from former versions. Once sorted under "Others", now in this section it allows you to set the path where to store your Project files (*.insprj) and to quick open that folder. You can find more about project files here.
Export File Path
By this you define the default export file path Studio202x shows you in the export dialog. This is very handy if you manage your files on different drives and don't want exports to go into the same folder as the source files.
Screenshot Save Path:
Former versions saved a screenshot - triggered by the use of the Snapshot option - to the same path as where the source content file was stored. That could make it difficult to get those files. Now you can choose between two ways:
- Use Current Preview File Path This is the known behaviour and saves the screenshot next to the source file it was taken from.
- Use Custom Path This allows you to define a dedicated path to use with your Snaphot / screenshots. Using this method helps you to keep your source file folders clean and original.
Keep in mind "Open" opens a file browser for that path. To change the path click on the edit icon at the start of the path field.
Others#
The last main section in the Preferences covers automatically functions of Studio202x.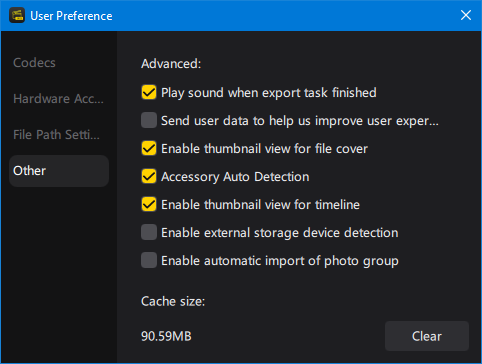 The main sub options are sorted under "Advanced":
Play sound when export task finished
That is pretty self explaining, isn't it? You enable/disable the "bing" sound played after an export was finally saved to disc. Some like it, some don't need it. It's up to your choice.
Send user data to help us improve user experience
With that you control if Studio202x is allowed to send data back to Insta360 on automatic basis. This also included crash data, but mostly - as far as I know - statistical data.
Enable Thumbnails
This enables/disables if Studio2021 provides thumbnails of images and videos on its different panes. This covers the content list pane, in list & thumbnail view mode. The parts preview row in the preview pane in case of an Interval Shot, HDR image, or AI "AutoFrame" results. This does not influence the with Studio202x installable file explorer thumbnail plugin.
Accessory Auto Detection
If enabled this allows Studio2021 to decide if and what kind of accessory you used on your camera. It then detects for example Lens Guards and different official cases.
Enable thumbnail view for timeline
Having this option enabled allows you to see a preview of the frame your mouse / playhead selector hovers over. This is handy while scrubbing through the timeline.
Enable external storage device detection
While enabled Studio202x will listen for events raised by the OS in case an external storage device is attached. Studio202x will check if that storage contains files created by an Insta360 camera. If that is the case it will ask you if those shall be imported into Studio202x. No files will be copied! But imported files will be listed under the "SDcard" icon on the content window.
Enable automatic import of photo group
Some shots consist of more than one image, for example a HDR shot consists of multiple bracket images. If this option is enabled, Studio202x checks if an image is part of a series of images when it is loaded. If this is the case, the other images of this series will also be loaded.
This series loading is only done for HDR (normal & DNG) and NightShot images. For Burst and IntervalShot images, additional images of this series are not loaded automatically.
Since Studio202x v4.0.0 you also have:
Cache size
Studio202x uses cached data at several occasions. Creating thumbnails for preview is the simplest part but also using "AI AutoFrame" uses cached data. Here you can see how much storage Studio202x uses for its cache and you can "Clear" the cache.